


Constructing a personalized lightsaber is thrilling; it lets you create a virtual version of the Star Wars world. The process begins with selecting a design; you can create something unique or replicate a famous one. Next, choose the parts; these include the hilt, blade, and electronics. Many online stores sell these components; some even offer kits to simplify the process.
Now, how do you start? The first step is to sketch your design; this helps you visualize your lightsaber and then gather the necessary tools and materials. Things like wires, LED lights, and a soldering iron are required. Remember to keep the power source! A battery pack is essential for making your lightsaber light up.
Finally, assemble your lightsaber, begin with the hilt, the handle of your lightsaber. Attach the electronics inside it; this includes the LED lights and soundboard if you're adding sound effects. Next, fit the blade into the hilt and ensure it's secure. Now, power it on. Congratulations! You've just made your custom lightsaber; this project combines creativity with technical skills. It's a rewarding experience that brings your favorite fantasy to life.
Choosing Your Design and Components
Choosing your design and components is the first exciting step in making a custom lightsaber. Think about what you want. Do you prefer a classic look or something modern? Your design can reflect your personality; look online for inspiration. Countless designs are shared by fans worldwide; after settling on a design, the next step is to select the components. A hilt, a blade, and electronics are required; each part is crucial for your lightsaber.
Consider the hilt's grip and weight; it should feel comfortable in your hand. The blade comes next; decide on its color and length. You'll need lights, a soundboard, and a power source for the electronics. Choose quality components for durability, high-quality parts make your lightsaber shine brighter and last longer. Enjoy selecting each piece; this is your lightsaber; make it special.
Sketching and Planning Your Lightsaber
To make your lightsaber a reality, draw it and take a pencil and paper first. Draw the hilt shape you imagine, and add details like buttons and grips. Think about the color of your blade. Will it be blue, green, or another color? Your sketch doesn't have to be perfect; it's about getting your ideas down. This is where your lightsaber starts to come alive; choose parts that match your drawing. This makes shopping for components easier.
Planning is fun and important; decide what materials you'll use for the hilt. Aluminum is popular for its durability and shine. Next, think about the blade; Polycarbonate tubes are strong and light up beautifully; don't rush this part. Take time to find the best parts; Your lightsaber will be unique. It will reflect your style and creativity; planning makes the building process smoother. You'll be ready to assemble with confidence.
Gathering the Necessary Tools and Materials
You'll need the right tools and materials to start your lightsaber project. First, a good soldering iron is essential. It connects electronic parts precisely; you also need a soldier and a soldering mat for safety. Remember screwdrivers, pliers, and wire cutters. These tools help in assembling parts neatly; for materials, LEDs are crucial for your saber's glow. A durable hilt material, like aluminum, gives it a real feel. Lastly, a high-quality plastic tube becomes the blade; it should be strong yet light.
Choosing the right electronics is also key; A soundboard adds cool effects, making your saber come alive. Batteries power the whole thing; ensure they're rechargeable for endless fun. Wires connect all electronic components; heat shrink tubing protects those connections. Gathering these items might take time, but it's worth it; with everything ready, you're set to build something amazing. Your custom lightsaber will be a reality soon.
Assembling the Hilt: The Foundation of Your Lightsaber
Assembling the hilt is a key step in creating your custom lightsaber. It's the handle, the part you hold; start by choosing your materials. Metals like aluminum offer durability and a sleek look; decide on the design next. Do you want something simple or intricate? Your choice sets the tone for your lightsaber. Now, cut and shape your materials; precision is crucial here. Each piece should fit together perfectly. Use tools like lathes for shaping; They help achieve a professional finish.
Now, it's time to assemble; begin with the core components. These include the battery pack and the switch; they're the heart of your hilt. Next, add the grip; it should feel comfortable in your hand. Finally, customize it; add details that make it uniquely yours. Colors, patterns, or engravings can add a personal touch. Assembling the hilt is exciting; it brings you one step closer to completing your custom lightsaber.
Installing the Electronics for Light and Sound
Installing the electronics adds life to your lightsaber. First, solder the LED lights for bright illumination and ensure connections are secure for safety. Next, add a soundboard for authentic sounds; choose sounds that fit your lightsaber's personality. Connect the battery pack carefully; this powers your lightsaber. Test each part as you go; this ensures everything works perfectly. Enjoy the process; seeing your lightsaber come to life is rewarding. Your creation now has light and sound, making it truly special.
Attaching the Blade and Final Assembly
Attaching the blade is a key step. First, ensure the hilt is ready and open; gently insert the blade into the hilt. It should fit snugly; if it wobbles, check the fit again. Secure the blade with screws or a retention system; this keeps it in place during use. Once attached, admire your work; the final assembly is now complete. Your custom lightsaber is ready. It's a thrilling moment; you've created something unique. It's time to light it up and enjoy the glow; Your effort has paid off beautifully.
Testing and Troubleshooting Your Custom Lightsaber
Testing your custom lightsaber is crucial. After assembly, power it on; does it light up? Great! Now, check the sound. If it's silent, recheck the connections; every part should fit perfectly. If something's off, don't worry; troubleshooting is part of the process. Loose wires often cause issues; secure them and try again. Remember, patience is key; you're closer to your goal with each step. Finally, when everything works, celebrate! You've successfully created your lightsaber. This achievement is not just fun; It's a testament to your skill and perseverance.
FAQs
What do I need to make a custom lightsaber?
You need parts like a hilt, blade, LED lights, battery pack, and tools like a soldering iron.
Can I design my lightsaber hilt?
Yes, you can design your hilt or replicate famous ones.
Where can I find lightsaber parts?
Parts are available at online stores specializing in lightsaber components.
Is it hard to make a custom lightsaber?
It requires patience and some technical skills but is relatively easy.
Do I need any special skills?
Basic soldering and some electronics knowledge will help.
Conclusion
Creating a custom lightsaber is a journey of creativity and technical skill. It starts with a dream and a design; choosing the right components is crucial. Then, you move on to assembling and soldering; each step requires patience and attention to detail. Testing and troubleshooting teach resilience. But when the lightsaber finally lights up and hums, it's magical. You've not just built a replica; you've brought a piece of the galaxy into your hands. This project blends imagination with reality. It's a tangible link to a beloved universe. Remember, anyone can embark on this adventure. The force of creativity is strong with all who dare to try.
Media Contact
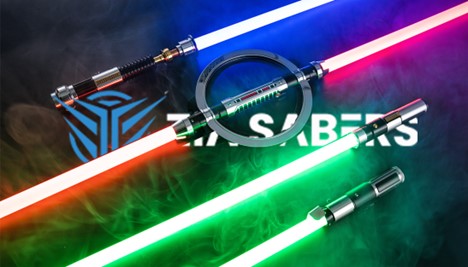
Company Name: ZIA Sabers
Contact Person: Media Relations
Email: Send Email
Address:10615 Clodine Rd
City: Richmond
State: Texas, 77407
Country: United States
Website: https://ziasabers.com
